Thursday, April 17, 2014

What Lies Beneath


Lovely, isn't it?  I see a whole lot of this on my frequent commutes to and from the city. This photo was taken on an especially pretty looking February day with brilliant blue, sunny skies and clean, dry roads. What you can't see in the photo is the gale force wind that was blowing my car all over the highway.

Life is like that sometimes.  It's often the things you can't see, or those that aren't at least readily evident, that create the largest impact.  Think about the last time you accidentally bit the inside of your mouth.  It's a small thing that nobody else knows about unless you tell them, but you can't think about anything else every time you eat or drink for a couple of days.  At least I can't when it happens to me.  But my pain threshold is pretty low.

I've done a lot of soul searching the last couple of weeks.  I spend quite a bit of time on my own when I stay in the city at The Rookery (a nickname I came up with for the place I stay when I'm there.  It was either that or the catacombs which is far too maudlin...neither is perfect, really).  When I first started staying there, it was great!  I had all this time on my own to do the things that I couldn't find time for at home.  I made baby gifts.  I tried new recipes.  I crocheted Christmas gifts and ornaments.  I read an actual book.  I tried English paper-piecing a small quilt which still isn't done but I work on it a bit here and there.

These little hexagons are all stitched together by hand.  It takes FOREVER.
But in the last couple weeks, The Rookery has become more of a pigeon hole.  It's a nice place. It's clean. There's a balcony.  There's a garage that keeps me from having to go out into bad weather to start on my way to work in the mornings.  It's quite comfortable.  I have my own space and I appreciate it so very much.  However, after a while on my own, I start to go a little nutty.

Yeah, yeah, I know.  How can you tell?  Ha. Ha.

In all that silence and by-my-self-ed-ness, it's easy to lose sight of the things that really matter. The little things that well up inside me can and do take over.  All those little things that I try so hard not show the world and that nobody would ever probably guess start to press their way out.  When it's just me, then me is all I have to look at.

I recently read a quote that said a life unexamined wasn't worth living and I suppose that's true to some extent.  I would like to counter and say that a life over-examined isn't properly lived at all.  Pieces of it are re-lived and replayed over and over.  Mistakes are re-made and magnified.  Molehills become mountains. I am haunted by my own creations. 

I am especially haunted lately.  Things have been happening in my life that I have no control over.  I feel betrayed...used...even though I probably have no right to feel that way.  That doesn't change the fact that I feel what I feel and in the big, empty shell of by-my-self-ed-ness, that feeling is enormous.  It crowds everything else out, good and bad, until all I'm left with is a certain sense of having somehow earned feeling so damned awful and alone.  What goes around, comes around is what we used to call it.

Which is, I'm told, utter nonsense.  Sitting here at home with my husband and my dogs and my real life all around me, I can see the wisdom in those words. The trick is remembering that when I'm holed up in that pigeon hole.

I keep telling myself that everything will be okay in the end.  And, if it's not okay, then it's clearly not the end.

Saturday, April 12, 2014

How I Start My Own Bedding Plants--a sort of tutorial

I get this question all the time. I get to talking with people about gardening and, inevitably, they ask me where I get my bedding plants. Sometimes the look of shock on their faces is priceless.  The conversation usually goes something like this:

"So, where do you buy your bedding plants?"

"I grow my own."

"You grow your own?  You can do that?"

"Of course I can do that.  Anyone can do that."

"I could never do that. I don't have that green of a thumb."

To that I say, "Utter nonsense."  Starting your own bedding plants requires absolutely no special equipment.  All you need is something to use for little pots, something that those little pots can sit in, some potting soil, a spot in a sunny window, some water and some seeds.


These are the first pepper plants I ever started from seed.

Here's how I do it:

Before starting, be sure to check to see when the seeds need to be started.  Many bedding plants are started six to eight weeks prior to planting outside.  For me, here in Nebraska zone 5, six weeks prior to last average frost is about mid-March.  I usually start my tomatoes then.  Plan ahead and make sure to start the seeds at the right time.

Step One:  Find something to use for a pot.  I like to make my own little pots from newspaper with a gadget I bought on Etsy awhile back:

Again, this is their picture.  Not mine.
But the same thing can be accomplished without the fancy gadget.  A small drinking glass or jar or wine bottle will work.  I make the paper pots and then fill them with seed starting mix or potting soil. Recycled yogurt containers or pudding containers make good pots if some little drainage holes are drilled in the bottom.  I've also used those little expanding peat moss pellets that can be found at the garden center.  They're fun to watch as they swell up while they soak up the water but I don't think they work any better than the paper pots. It says on the package that the pellets can be planted covering and all.  However, I usually remove the film on the outside of the pellet before planting.  I've found them totally intact in my garden years after planting.

Step Two:  Put the pots in a plastic tray or other water-proof container.  The clam shell containers that cakes and such come in from the bakery work really well for this.  My containers are similar clear plastic clam shell type storage containers I got from my Mom.  I am not sure where she got them.  Probably on the home shopping network.

The paper pots with the soil added...in most of them.
Step Three:  Add seeds and cover them with soil to the proper depth.  Planting depth information will be found on the seed package.  I usually put two or three seeds per pot.  Once they have sprouted, it's easy to choose the strongest seedling in each pot and simply cut off any others that emerge later...or not.  I tend to leave them all to grow.  I can be too soft hearted sometimes.

Marigolds are 
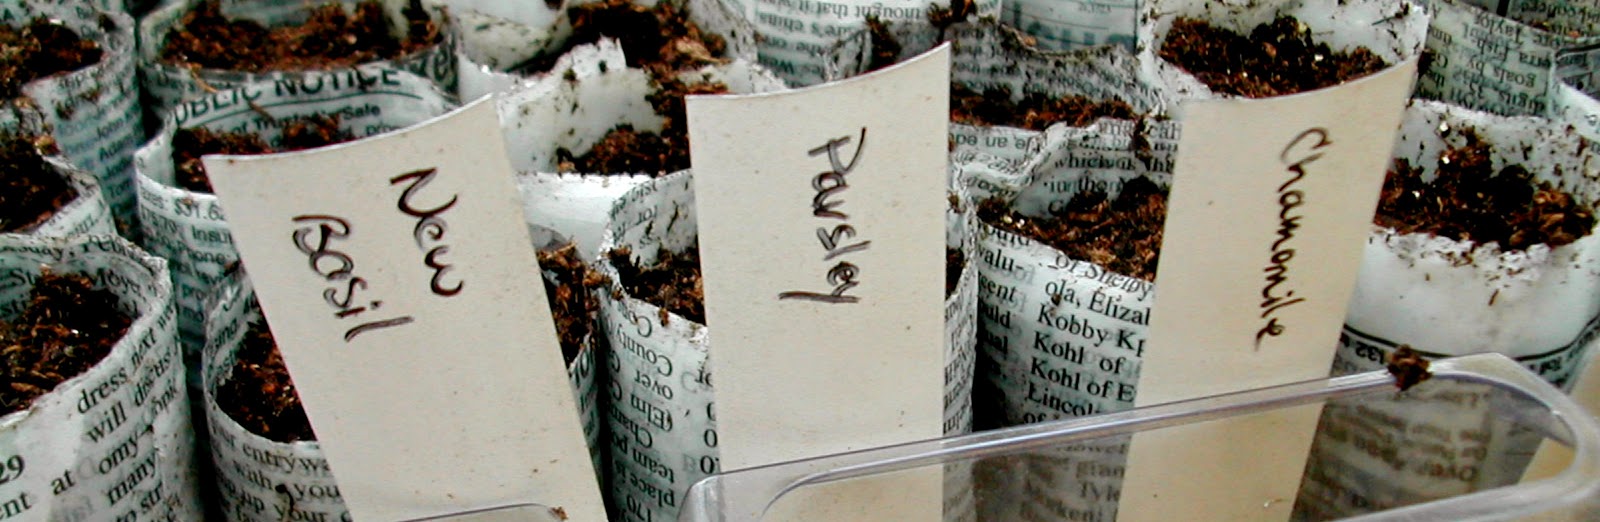
very easy to grow from seed and they are pretty forgiving and so make an excellent choice for a first attempt.  Be sure to label the pots with their contents.  Seedlings look remarkably similar until they get a few sets of true leaves.


I make my own labels, too.  These are made from an old mini-blind that I tore apart and cut up the slats.  A black Sharpie marker works pretty good for labeling.  Any other color tends to fade quickly in the sunlight. The best bet when using markers is to place the labels so the writing is not in the sun.  I've also made labels to stick on with a P-Touch label maker.  These little mini-blind labels are very durable.  The marker can be cleaned off with a bit of rubbing alcohol allowing re-use for several years.  They absolutely do not break down in the sunlight or in the soil.  I've dug them up a couple years later, washed them off and re-used them.


Step Four:  Water the little pots with your red watering can.


If you don't have a red watering can, I suppose an empty milk jug will do.  But this project will definitely go better with the proper tools.

Step Five:  Cover the little pots.  This is why I suggested the clam shell container from the bakery.  For best results, use a container that can be closed up to help hold the moisture in for the seeds.  Alternatively, just about any type of tray can be covered with plastic wrap or, if it's small enough, the whole thing could be placed inside a clear plastic bag.


Step Six: Wait for the seeds to sprout.  Now this is probably the only tricky part.  Some seeds require a specific temperature range for germination.  Other seeds need a pretreatment in cold or 'scarification' which means to cut or nick the seed coat prior to planting.  Some seeds will germinate faster if  they are soaked overnight in warm water.  Most seeds just won't grow if the temperature is too cold or not consistently warm enough.  Fancy seed starting heat mats can be used.  I usually just set them in the window on a shelf and wait for them to decide it's time to grow.  Keep them moist, but not drowning.  Some seeds require light to germinate but most don't need light until they emerge from the soil.

Step Seven:  After tiny little sprouts appear in the pots, open up whatever covering is over the pots.  The little bitty plants will need to have access to fresh air for gas exchange.  At this point, the seedlings are subject to a condition known as 'damping off' which can kill the plants before they really have a chance to grow.  Make sure they have adequate fresh air.  I prop the lid of my clam shell up with a clothespin.


Move the plants to a sunny location.  Grow lights will help; but, they aren't required for success.  I've done this with just a sunny window and some TLC.  Give the young plants as much light as possible.  Turn the pots every day or so to keep the plants growing up straight as they will tend to lean towards the light.

Step Eight:  Getting ready to plant the seedlings in the garden takes some time and patience.  Remember that these little plants have been growing in a very stable and comfortable setting. They need to be 'hardened off.'  What that means is that the plants must be gradually introduced to the outside world a little at a time. Put the plants out in a protected area for a couple hours a day and gradually extend the time they are outside over a couple weeks' time.

Step Nine:  Planting out the seedlings.  Hooray!  The plants are ready to go out on their own.  Putting these plants out in the garden is best done on a cloudy day if possible.  Marigolds can be planted out just like any other annual flower from the nursery.  Vegetable plants will benefit from a little extra protection while they get established in the garden  Cut off the bottom of a translucent gallon milk jug and put it over the freshly planted tomato or pepper plant.


Here is how I used some milk jugs.  Two-liter soda bottles work, too.
 The jug will protect the plant from the sun's harshness and give them time to grow into their new home.  When the plants start to outgrow their covering, take the jug off on a cloudy day.  I have another method that I use with my tomato plants that I find works really, really well.  


But that's another blog.  The milk jug will work just fine.

TA DA!  Home grown bedding plants.  It seems like a lot of work.  But, I like to do it because, in the long run, it's less expensive than buying bedding plants and I can get a lot more varieties of plants than are usually offered at the garden center or nursery.   Also, since the plants are started 6 to 8 weeks prior to planting out, I get to start gardening lots sooner in the year. And now so can you.  Let me know how your plants grow!

Rolling with the Changes

Things are changing in my little world.  I foresee lots of upheaval on the horizon.  I haven't really figured out how to talk about exactly what is happening other than it will change a really big part of my life.  I will blog about it eventually when I get a little distance and perspective. So, until then, I'm keeping this in mind.

In light of the changes on the way, I've changed the name of the blog.  'Almost an Acreage' was a silly title that I put up there because I had to name it something.  The new name is more fitting and has more meaning.  Mostly because my husband and I say it every blessed time we come home.

We come around the corner and down our street to the house and one or both of us says, "Here's our little slice!" followed by smiles and knowing glances.   I can't imagine that there is another couple in the whole world so pleased every time they come within view of their home.  I do imagine that most people see a house as a place to live.  This little place means so much more than that to us.

The place is really small.  We're on a 75 foot by 75 foot lot.  Not anywhere near an acreage of any kind.  But we pack a lot of living in our little space.

In other news, spring is springing!  Today we took a trip to the home store and along with some other things, I brought home these little lovelies:

Starry Night Viola

Blue Moon Viola
I have a special place in my heart for violas.  My paternal grandmother's name was Viola.  Actually, Viola was her middle name. Her first name was Temperance. But, I didn't know that until long after she was dead.  I'm told she absolutely hated it.  I can only imagine the fire daggers from her eyes if I had called her Temperance...or 'Tempie' as she was known as a child.

Okay, time to change the subject.  She'll probably come back and haunt me for that.  Maybe I can keep her at bay with this:

Grandma's fine-leaved peonies
Last fall, I rescued Grandma's fine-leaved peonies from the drought stricken garden at her house in The Burg.  They have emerged from the ground in their new homes and are growing well.  It even looks like they might flower this year already.

In the greenhouse, the seedlings are coming along splendidly.  The tomatoes have all germinated and are finally starting to grow their first true leaves. Low light conditions on the kitchen shelf made them a wee bit spindly.  I'll plant them extra deep in the garden bed when the time comes and they'll grow lots more roots along that spindly stem.

"We're not really this pale.  It's just the lighting."
The sweet peppers have sprouted as well.  For some reason, the hot peppers aren't growing yet.  I'm hopeful that they're just being picky about the temperature.  It's been difficult to moderate the temperature in the greenhouse so I moved them back inside until they germinate.  Just in case they don't, I bought a six pack of chili peppers today.  I'll have to find some jalapenos if worse comes to worst.


I keep things well watered in the greenhouse with this spiffy red watering can.  My husband (the best husband EVER) got me this watering can for Valentine's Day.  Is that love or what?


I don't know about you, but for me spring just isn't spring without berries!  Here we have the first strawberries peaking out from under their leafy mulch.  Below that is a shot of the gooseberry bush I planted last year with its first flush of leaves.  Berries might be my favorite fruit.  Maybe that's why I've planted six different kinds.

Baby strawberries.

Pixwell gooseberry bush.
This year, spring brings a lot of new changes for us and our little slice.  All will be well, I'm sure, but it might be a long, tough row to hoe.

It doesn't really fit here, but I'll leave you with this gem because I love it.  Rock on!

Saturday, April 5, 2014

April Garden Update

I know, I know.  It's April.  In Nebraska.  What sort of update can I possibly have?  Well, let me tell you that I managed to do some things outside today and I'm pretty happy about it.  It wasn't what I'd call a gorgeous spring day. But, it was rather pleasant for most of the afternoon.

I planted some stuff today: 
  • Peas (Sugar Snap).  
  • Carrots (Nantes...something).  
  • Beets (Detroit Dark Red...I wanted Bull's Blood but I couldn't find any seed) 
  • Swiss chard (Bright Lights) 
  • Leaf lettuce (Black Seeded Simpson) 
  • Radishes (Giant Globe...mostly because they grow quickly and give some speedy gardening gratification) 
If I hadn't left my camera in the city when I came home yesterday, I'd have some pictures of the seeds being planted or something.


But I don't.  I might even have uploaded a nice picture of my rhododendron that looks fantastic already this year. 

Rats.

I also raked and raked and raked leaves.  I raked until my shoulder and the wind decided I shouldn't rake anymore and then I called for a cease-rake and put it all away.  Three huge bags went into the big pile o' bags in the back garden.

Mulch and compost in potentia.

Actually, it was no mean feat this leaf gathering.  After the spate of wet snow we had earlier this week, all those leaves were wet enough to clog up the mower chute and some of the piles were still frozen in places.  But that's okay.  They'll rot a little faster with some moisture in those bags.

I also started some marigold seeds and some more hot peppers (okay, admittedly that was last week, but it's too late to do a March garden update).  The first batch of pepper seeds I planted didn't germinate.  Every year it seems there is one thing or another that just won't grow for me.  Last year it was beans.  This year it seems it could be peppers.  At least I could go buy pepper seedlings if I wanted to.

The tomatoes I started a couple weeks ago haven't sprouted yet either.  The sad thing is I will have roughly 5,000,000 volunteer tomatoes in the garden once spring is well and truly underway.  I'll be uprooting and discarding them all summer long.

I also uprooted and transplanted, to pots this time, a fair whack of yarrow plants.  They didn't really seem to actually be rooted to anything.  They were more or less just sitting on top of the soil like they knew I was coming to take them away and they wanted to be ready.  I can't begin to fool myself into thinking that I got all of them and that bed will be yarrow-free anytime soon. 

Some people have complained to me that mint is the most invasive and difficult to eradicate plant they've ever grown.  Clearly they've never grown yarrow.  Or comfrey.  I thought I'd never get it out!  I do wish comfrey was more attractive.  I hear it has some interesting qualities in the garden and that some gardeners grow it to make comfrey tea to put on their plants and beds.  Here's a link to an article about comfrey in the garden.  After reading that again, I may have to find an out-of-the-way spot for more comfrey.

We've been monitoring the temperature in the greenhouse with a remote thermometer for several weeks now.  A few weeks ago, we put a small, oil-filled heater in the greenhouse and I've determined that it seems to keep things above freezing at least.  So, I moved my seedlings from the kitchen window where they were starting to get leggy and light-starved to the table in the greenhouse where they will receive ample sunlight.  Keeping fingers crossed that all goes well there.  The tomatoes I started are out in the greenhouse and I'm wondering if maybe the temperature just isn't consistent enough for germination.  They may have to come inside for a few days to get going.

I just don't know.

I do know that I'm fixing to run out of planting room in a hurry.  So much growing, so little space...